
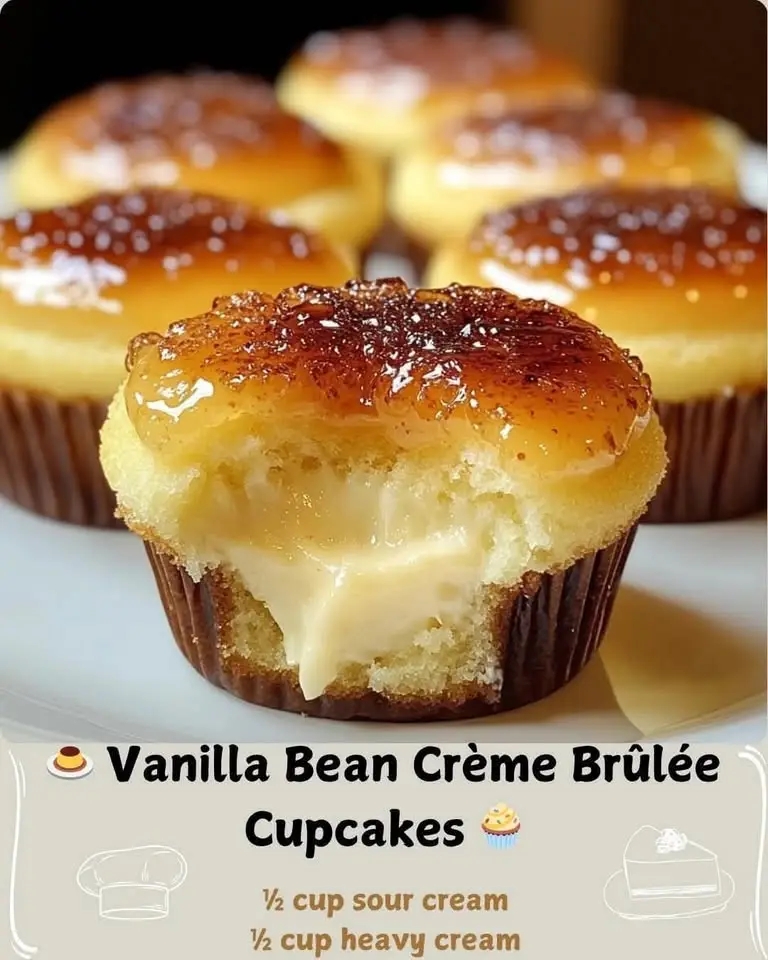
Vanilla Bean Crème Brûlée Cupcakes – Creamy, Dreamy & Caramelized to Perfection
These luscious cupcakes combine the silky richness of vanilla bean cheesecake with the crackly caramelized top of a classic crème brûlée. Nestled on a buttery graham cracker crust and finished with a brûléed sugar crown, they’re a decadent dessert that’s as impressive as it is irresistible.
Introduction: A Dessert Mashup Worth Celebrating
If you’ve ever found yourself torn between a creamy cheesecake and the elegant simplicity of crème brûlée, this dessert is your dream come true. These Vanilla Bean Crème Brûlée Cupcakes are a hybrid of two beloved classics—each bite delivers the tangy richness of cheesecake, the aromatic warmth of real vanilla bean, and the satisfying crackle of caramelized sugar.
Perfect for dinner parties, birthdays, bridal showers, or just a luxurious weekend bake, these cupcakes are guaranteed to wow your guests and satisfy your sweet tooth.
Ingredients Breakdown
Let’s take a closer look at what makes these cupcakes so special:
For the Graham Cracker Crust:
- Graham cracker crumbs (1 cup)
The buttery base that adds crunch and a toasty flavor. - Granulated sugar (2 tbsp)
Sweetens the crust and helps it set. - Unsalted butter (4 tbsp, melted)
Binds the crumbs and adds richness.
For the Cheesecake Filling:
- Cream cheese (16 oz, softened)
The heart of the cheesecake—smooth, tangy, and creamy. - Granulated sugar (½ cup)
Sweetens the filling without overpowering the vanilla. - Eggs (2 large)
Provide structure and richness. - Sour cream (½ cup)
Adds tang and a silky texture. - Heavy cream (½ cup)
Makes the filling extra luscious. - Vanilla bean (1, seeds scraped) or vanilla bean paste (2 tsp)
Adds deep, aromatic vanilla flavor and those beautiful specks. - Vanilla extract (1 tsp)
Enhances the vanilla profile.
For the Crème Brûlée Topping:
- Granulated sugar (¼ cup)
Sprinkled on top and torched to create that signature caramelized crust.
Optional: Add a pinch of sea salt to the sugar topping for a salted caramel twist.
Equipment Needed
- Standard muffin tin
- Cupcake liners
- Mixing bowls
- Electric mixer or whisk
- Measuring cups and spoons
- Spatula
- Kitchen torch
- Cooling rack
- Oven
Step-by-Step Instructions
Step 1: Preheat Oven & Prepare Pan
Preheat your oven to 325°F (160°C).
Line a standard muffin tin with cupcake liners and set aside.
Step 2: Make the Crust
In a medium bowl, combine:
- 1 cup graham cracker crumbs
- 2 tbsp granulated sugar
- 4 tbsp melted butter
Mix until the crumbs are evenly moistened.
Spoon about 1 tablespoon of the mixture into each cupcake liner.
Press down firmly using the back of a spoon or a small glass to form a compact base.
Tip: Chill the crusts for 10 minutes while you prepare the filling to help them set.
Step 3: Prepare the Cheesecake Filling
In a large mixing bowl:
- Beat 16 oz softened cream cheese and ½ cup granulated sugar until smooth and creamy.
Add 2 eggs, one at a time, mixing well after each addition.
Stir in:
- ½ cup sour cream
- ½ cup heavy cream
- Vanilla bean seeds (or 2 tsp vanilla bean paste)
- 1 tsp vanilla extract
Mix until fully blended and silky.
Tip: Avoid overmixing to prevent incorporating too much air, which can cause cracks.
Step 4: Fill the Cupcake Liners
Divide the cheesecake batter evenly among the liners, filling each about ¾ full.
This allows room for the filling to rise slightly without overflowing.
Step 5: Bake Until Set
Bake for 20–25 minutes, or until:
- The tops are lightly golden
- The centers are just set and jiggle slightly when gently shaken
Avoid overbaking to maintain a smooth, custard-like texture.
Remove from oven and let cool in the pan for 15 minutes.
Transfer to a cooling rack and let cool completely.
Step 6: Chill
Refrigerate the cupcakes for at least 2 hours, or overnight for best results.
This allows the filling to firm up and develop its rich, creamy texture.
Step 7: Add the Crème Brûlée Topping
Just before serving:
- Sprinkle 1 teaspoon of granulated sugar evenly over each cupcake.
Using a kitchen torch, melt and caramelize the sugar until it turns a deep amber color and forms a crisp shell.
Let the sugar cool and harden for 1–2 minutes before serving.
Tip: If you don’t have a torch, you can place the cupcakes under a broiler for 1–2 minutes—watch closely to avoid burning.
Serving Suggestions
Perfect for:
- Dinner parties
- Holiday dessert tables
- Bridal or baby showers
- Romantic date nights
Pair with:
- A glass of Prosecco or dessert wine
- Fresh berries or berry compote
- A dusting of powdered sugar or edible gold leaf for extra glam
Presentation Tip: Serve on a tiered dessert stand or individual plates with a sprig of mint for a polished look.
Variations to Try
Want to make them your own? Try these delicious twists:
Chocolate Crust
Use crushed chocolate cookies instead of graham crackers for a richer base.
Lemon Twist
Add lemon zest to the filling for a citrusy brightness.
Berry Swirl
Swirl in raspberry or strawberry puree before baking.
Vegan Version
Use dairy-free cream cheese, coconut cream, and egg replacer.
Storage and Make-Ahead Tips
- Make-Ahead: Bake and chill cupcakes up to 2 days in advance.
- Add topping just before serving to maintain the crisp brûlée layer.
- Refrigerate: Store in an airtight container for up to 5 days.
- Freeze: Freeze unfrosted cupcakes for up to 1 month. Thaw overnight in the fridge and brûlée before serving.
Tip: Store with parchment between layers to prevent sticking.
Nutrition Notes (Per Cupcake, ~1 of 12)
- Calories: ~280
- Protein: ~4g
- Carbohydrates: ~20g
- Fat: ~20g
- Sugar: ~15g
- Sodium: ~120mg
- Fiber: ~0.5g
These cupcakes are:
- Creamy and rich
- Elegant and indulgent
- Perfectly portioned
- Great for sharing
Final Thoughts
These Vanilla Bean Crème Brûlée Cupcakes are more than just a dessert—they’re a celebration of texture, flavor, and the joy of baking something truly special. Whether you’re impressing guests or treating yourself, they’re sure to become a new favorite.