
No-Knead Sandwich Bread
Soft, Fluffy, Egg-Free, Butter-Free Homemade Bread Anyone Can Make
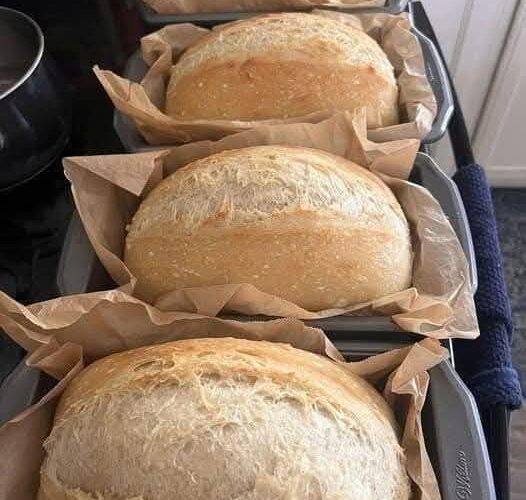
There are few things more satisfying than pulling a loaf of fresh bread out of the oven, especially when it requires almost no effort. This no-knead sandwich bread is one of those recipes that quickly becomes a staple once you try it. It is soft, light, and perfectly sliceable, with a tender crumb that works for everything from morning toast to lunchtime sandwiches.
What makes this bread truly special is its simplicity. There is no kneading, no eggs, no butter, and no complicated techniques. Just a bowl, a spoon, and a little patience. Despite its humble ingredient list, the result is a bakery-quality loaf that tastes fresh, comforting, and homemade in the best possible way.
This is the kind of bread recipe people keep asking for. It is easy enough for beginners, dependable enough for experienced bakers, and versatile enough to suit almost any meal. Whether you are making school lunches, office sandwiches, or simply enjoying a warm slice with butter or jam, this bread delivers every time.
Why This No-Knead Bread Is So Popular
The appeal of this sandwich bread lies in its balance of ease and quality. Many people assume that homemade bread must be labor-intensive, requiring kneading, special equipment, or enriched ingredients like eggs and butter. This recipe proves otherwise.
Here is why this bread has become a favorite:
It requires no kneading at all
It uses pantry-friendly ingredients
It is egg-free and butter-free
It produces a soft, fluffy crumb
It slices beautifully for sandwiches
It is reliable and forgiving
The long, slow rise does the work that kneading normally would, allowing gluten to develop naturally. This results in a loaf that is tender yet structured, light but sturdy enough for fillings.
What Makes No-Knead Bread Work
Traditional bread recipes rely on kneading to develop gluten, the protein structure that gives bread its elasticity and chew. In no-knead bread, time replaces effort. By allowing the dough to rest and rise undisturbed, gluten forms gradually on its own.
This method creates several advantages:
Less physical effort
More forgiving dough
Better flavor development
Softer crumb
Because the dough is wetter and stickier than kneaded doughs, it traps moisture during baking, leading to a soft interior and a tender crust that stays pleasant even after cooling.
Ingredient Breakdown and Their Roles
Because this recipe uses only a handful of ingredients, understanding their role is important.
All-Purpose Flour (3 ½ cups / 440g)
All-purpose flour provides the structure of the bread. It has enough protein to develop gluten while still producing a soft crumb. Bread flour can be used, but the texture will be slightly chewier.
Warm Water (1 ½ cups / 360ml)
Water hydrates the flour and activates the yeast. It should be warm, not hot, ideally between 100–110°F (38–43°C). Water that is too hot can kill the yeast, while water that is too cool will slow fermentation.
Sugar (2 teaspoons)
Sugar feeds the yeast, helping it activate and rise properly. It also adds a subtle sweetness that enhances flavor without making the bread sweet.
Salt (1 ½ teaspoons)
Salt strengthens gluten and balances flavor. It also controls yeast activity, preventing the dough from rising too quickly.
Instant Yeast (2 ¼ teaspoons / 1 packet)
Instant yeast is reliable and easy to use. It allows the dough to rise efficiently and evenly. Active dry yeast can also be used, though rise times may vary slightly.
Equipment You Will Need
Mixing bowl
Wooden spoon or spatula
Loaf pan
Clean kitchen towel or plastic wrap
Measuring cups and spoons
Oven
No stand mixer, dough hook, or kneading surface is required.
Step-by-Step Instructions
Step 1: Activate the Yeast
In a large mixing bowl, combine the warm water, sugar, and yeast. Stir gently and let the mixture sit for 5 to 10 minutes. During this time, the yeast should become foamy and bubbly. This indicates that it is active and ready to use.
If no foam appears, the yeast may be expired or the water temperature may be incorrect.
Step 2: Mix the Dough
Add the flour and salt to the yeast mixture. Using a wooden spoon or spatula, stir until all the flour is fully incorporated. The dough will be sticky, wet, and shaggy. This is exactly how it should be.
Do not add extra flour. A sticky dough is key to achieving a soft loaf.
Step 3: First Rise
Cover the bowl with a clean kitchen towel or plastic wrap. Place it in a warm, draft-free area and allow the dough to rise for about 1 hour, or until it has doubled in size.
During this time, the yeast ferments the dough, creating air bubbles and flavor.
Step 4: Prepare the Loaf Pan
Lightly grease a loaf pan with oil or nonstick spray. This prevents sticking and helps the bread release cleanly after baking.
Step 5: Transfer the Dough
Once the dough has risen, gently scrape it into the prepared loaf pan. Use a spatula or lightly oiled hands to smooth the top. Do not punch the dough down aggressively; gentle handling preserves the air bubbles.
Step 6: Second Rise
Cover the loaf pan loosely and let the dough rise again for about 30 minutes. The dough should rise just above the rim of the pan.
This second rise ensures a light, even crumb.
Step 7: Bake the Bread
Preheat the oven to 375°F (190°C).
Bake the bread for 30 to 35 minutes, or until the top is golden brown and the loaf sounds hollow when tapped.
If the top browns too quickly, tent loosely with foil for the last 10 minutes.
Step 8: Cool Before Slicing
Remove the bread from the oven and let it cool in the pan for 10 minutes. Then transfer it to a wire rack to cool completely before slicing.
Cooling allows the crumb to set properly and prevents gummy texture.
Texture and Flavor Profile
This no-knead sandwich bread has a soft, tender crumb with small, even air pockets. The crust is thin and lightly golden, making it easy to slice and perfect for sandwiches.
The flavor is mild and slightly yeasty, with just enough salt and sweetness to complement both savory and sweet toppings.
Serving Suggestions
This bread is incredibly versatile and works well for:
Sandwiches and wraps
Toast with butter or jam
Grilled cheese
French toast
Bread pudding
Panini
Avocado toast
It also makes excellent toast that crisps beautifully while staying soft inside.
Storage and Shelf Life
Room temperature: Store in a bread bag or airtight container for up to 3 days.
Refrigerator: Not recommended, as it dries out the bread.
Freezer: Slice and freeze for up to 3 months. Thaw at room temperature or toast directly from frozen.
Variations and Add-Ins
You can easily customize this bread:
Add herbs for savory bread
Mix in seeds for texture
Use whole wheat flour for part of the flour
Add honey instead of sugar
Brush with olive oil before baking for a softer crust
Common Mistakes to Avoid
Adding too much flour
Using water that is too hot
Skipping the second rise
Slicing while hot
Overbaking
Why This Recipe Is Perfect for Your Website
This no-knead sandwich bread appeals to a wide audience:
Beginner bakers
Busy families
Egg-free and dairy-free eaters
Budget-conscious cooks
Home bakers looking for reliability
It is approachable, practical, and repeatable, making it ideal for long-term engagement and sharing.
Final Thoughts
This no-knead sandwich bread proves that homemade bread does not have to be complicated. With minimal ingredients and almost no effort, you can create a loaf that is soft, fluffy, and deeply satisfying.
It is the kind of recipe that builds confidence in the kitchen and quickly becomes part of your routine. Once you experience how easy and delicious it is, store-bought bread becomes much less appealing.
Just tell me what you would like next.