
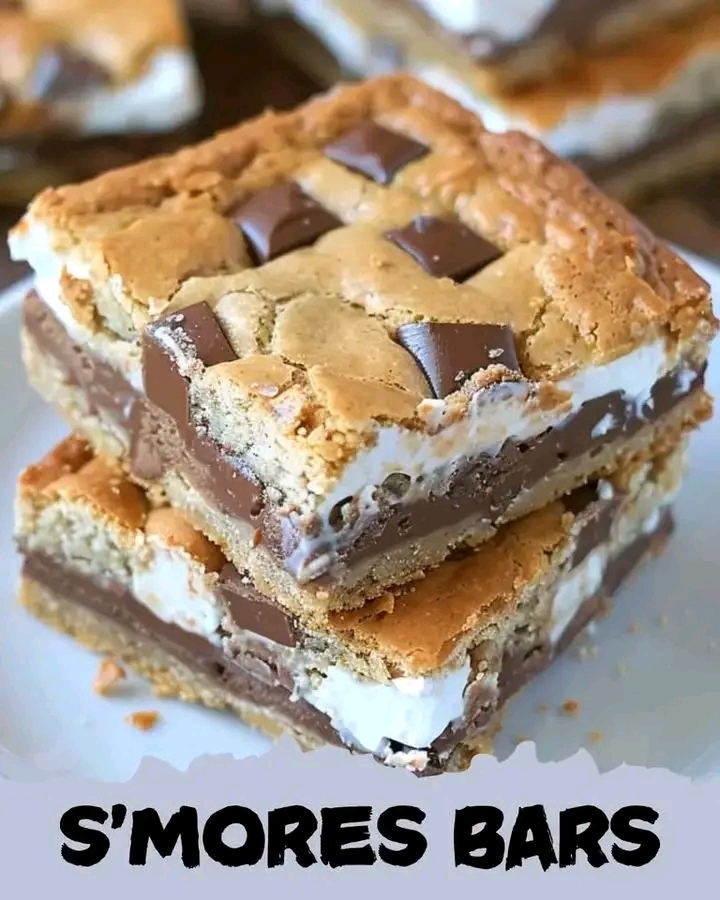
S’mores Bars: Gooey, Chocolatey, and Campfire-Inspired
Layers of graham cracker crust, sweetened condensed milk, melty chocolate, and toasted marshmallows—this oven-baked treat brings the bonfire indoors
Introduction: A Campfire Classic, Reimagined
These S’mores Bars are everything you love about the iconic fireside treat—crunchy graham crackers, creamy milk chocolate, and gooey toasted marshmallows—stacked into a decadent dessert bar. No need for skewers or smoky flames, just a baking dish and a few pantry staples.
Whether you’re baking for a party, a cozy night in, or just craving something sweet and nostalgic, these bars deliver all the flavor of s’mores with the ease of oven baking.
Ingredients Breakdown
Let’s explore what makes these bars so irresistible:
Crust:
- Unsalted butter (½ cup, melted)
Adds richness and binds the crust. - Graham cracker crumbs (1 cup)
Provide the classic s’mores base. - Granulated sugar (½ cup)
Adds sweetness and helps crisp the crust. - Salt (⅛ tsp)
Balances the sweetness.
Tip: Use a food processor for fine crumbs and even mixing.
Filling:
- Sweetened condensed milk (1 can, 14 oz)
Adds creamy sweetness and helps hold the layers together. - Milk chocolate chips (2 cups)
Melt into gooey perfection—use high-quality chips for best flavor.
Optional: Swap for semi-sweet or dark chocolate for a richer twist.
Topping:
- Mini marshmallows (2 cups)
Toast to golden perfection for that classic s’mores finish. - Crushed graham crackers (1 cup)
Add crunch and visual appeal.
Optional: Add a drizzle of melted chocolate or caramel for extra flair.
Step-by-Step Instructions
Step 1: Preheat Oven
Set oven to 350°F (175°C).
Line a 9×13-inch baking dish with parchment paper or spray with nonstick spray.
Tip: Leave an overhang for easy lifting and slicing.
Step 2: Make the Crust
In a medium bowl:
- Mix melted butter, graham cracker crumbs, sugar, and salt.
Press firmly into bottom of prepared pan.
Use a flat-bottomed glass for even pressing.
Step 3: Layer the Filling
Pour sweetened condensed milk evenly over crust.
Sprinkle chocolate chips evenly over milk layer.
Optional: Add chopped nuts or crushed cookies for texture.
Step 4: Bake
Bake for 20–25 minutes, until:
- Edges are golden
- Chocolate is slightly melted
Remove from oven.
Step 5: Add Marshmallows
Immediately sprinkle mini marshmallows evenly over top.
Return to oven for 5–7 minutes, until:
- Marshmallows are golden brown
- Puffy and toasted
Tip: Watch closely—marshmallows toast quickly!
Step 6: Finish and Cool
Remove from oven.
Sprinkle crushed graham crackers over top.
Let cool completely.
For cleaner cuts, chill in refrigerator for at least 1 hour before slicing.
Presentation Tip: Slice into squares and serve on a rustic wooden board with extra marshmallows.
Serving Suggestions
Perfect for:
- Bake sales
- Birthday parties
- Movie nights
- Summer gatherings
Pair with:
- Cold milk
- Hot cocoa
- Vanilla ice cream
Tip: Serve warm for extra gooeyness or chilled for firmer texture.
Variations to Try
Want to make it your own? Try these delicious twists:
Dark Chocolate S’mores
Use bittersweet chocolate chips and add a pinch of espresso powder.
Peanut Butter S’mores
Add peanut butter chips or swirl peanut butter into the condensed milk layer.
Nutty Crunch
Add chopped pecans or almonds to the chocolate layer.
Berry S’mores
Add a layer of raspberry jam or fresh berries before baking.
Vegan Version
Use plant-based butter, dairy-free condensed milk, and vegan marshmallows.
Storage and Make-Ahead Tips
- Make-Ahead: Prepare up to 2 days in advance.
- Refrigerate: Store in airtight container for up to 5 days.
- Freeze: Freeze sliced bars for up to 2 months. Thaw at room temperature.
Tip: Layer parchment between bars to prevent sticking.
Nutrition Notes (Per Bar, ~1 of 16)
- Calories: ~280
- Protein: ~3g
- Carbohydrates: ~32g
- Fat: ~14g
- Sugar: ~24g
- Sodium: ~120mg
- Fiber: ~1g
These bars are:
- Kid-friendly
- Comfort food approved
- Perfect for gifting
- Great for sharing
Final Thoughts
These S’mores Bars are more than just dessert—they’re a bite of nostalgia, a celebration of gooey goodness, and a guaranteed crowd-pleaser. Whether you’re baking them for a party or sneaking a square for yourself, they’re sure to bring smiles.