
Melt-in-Your-Mouth Lemon Curd Thumbprint Cookies
There are few cookies as timeless, elegant, and comforting as lemon curd thumbprints. These delicate, buttery cookies with their bright citrus centers strike the perfect balance between rich and refreshing. Each bite begins with a tender, melt-in-your-mouth crumb that gives way to a smooth, tangy lemon curd filling, creating a cookie that feels both nostalgic and sophisticated.
Lemon curd thumbprints have long been a favorite for holidays, afternoon tea, bridal showers, and special occasions, yet they are simple enough to bake any day of the year. Their sunny flavor makes them especially welcome during spring and summer, but their buttery richness fits just as beautifully on a winter cookie tray.
This recipe focuses on classic technique, quality ingredients, and careful baking to produce thumbprint cookies that are soft, flavorful, and visually stunning. Whether you are an experienced baker or just beginning your baking journey, this guide will walk you through every step, from choosing ingredients to perfecting the lemon curd center.
Why Lemon Curd Thumbprints Are So Special
Thumbprint cookies are traditionally made by pressing a small indentation into cookie dough and filling it with jam or preserves. Lemon curd takes this concept to another level. Instead of sweetness alone, lemon curd adds brightness, acidity, and complexity.
What makes these cookies truly exceptional is contrast:
- The buttery cookie base is rich, soft, and tender.
- The lemon curd is silky, vibrant, and slightly tart.
- Together, they create a balanced dessert that never feels heavy.
These cookies also age beautifully. The flavors deepen after a day, and the lemon curd remains smooth and luscious. They store well, travel well, and always look impressive on a dessert table.
Ingredients Overview
This recipe is divided into two main components: the cookie dough and the lemon curd filling. Each ingredient plays a specific role, and understanding them will help ensure success.
For the Cookies
- Unsalted butter provides richness and flavor while allowing you to control the salt level.
- Granulated sugar adds sweetness and helps create a tender crumb.
- Egg yolk contributes richness and softness without making the cookies cakey.
- Vanilla extract enhances the buttery flavor.
- All-purpose flour provides structure while remaining delicate.
- Salt balances sweetness and enhances flavor.
For the Lemon Curd Filling
- Fresh lemon juice gives the curd its bright, citrusy flavor.
- Lemon zest adds aromatic oils and depth.
- Granulated sugar sweetens the curd while allowing lemon flavor to shine.
- Egg yolks create a thick, silky texture.
- Unsalted butter gives the curd richness and smoothness.
Using fresh lemons is essential. Bottled juice simply cannot replicate the freshness and aroma that define excellent lemon curd.
Ingredient List
For the Cookies
- 1 cup (2 sticks) unsalted butter, softened
- 1/2 cup granulated sugar
- 1 large egg yolk
- 1 teaspoon vanilla extract
- 2 cups all-purpose flour
- 1/4 teaspoon salt
For the Lemon Curd Filling
- 1/2 cup fresh lemon juice (about 2–3 lemons)
- 1 tablespoon lemon zest
- 1/2 cup granulated sugar
- 3 large egg yolks
- 4 tablespoons unsalted butter, cut into small pieces
Equipment Needed
- Mixing bowls
- Electric mixer or hand whisk
- Measuring cups and spoons
- Microplane or fine grater
- Saucepan
- Whisk
- Baking sheets
- Parchment paper
- Small spoon or piping bag
Step-by-Step Instructions
Step 1: Prepare the Lemon Curd
Making lemon curd first allows it to cool and thicken properly before filling the cookies.
In a medium saucepan, whisk together the lemon juice, lemon zest, sugar, and egg yolks until smooth. Place the saucepan over medium-low heat and cook gently, whisking constantly. Patience is essential here. The mixture should never boil, as excessive heat can cause the eggs to scramble.
After about 8 to 10 minutes, the curd will begin to thicken. It should coat the back of a spoon and hold a clean line when you run your finger through it.
Remove the saucepan from heat and immediately whisk in the butter pieces one at a time until fully melted and incorporated. The result should be smooth, glossy, and rich.
Transfer the lemon curd to a bowl, cover it with plastic wrap pressed directly onto the surface, and refrigerate until fully cooled.
Step 2: Make the Cookie Dough
In a large mixing bowl, beat the softened butter and granulated sugar together until light and creamy. This step incorporates air into the dough, ensuring a tender texture.
Add the egg yolk and vanilla extract, mixing until fully combined. Scrape down the sides of the bowl to ensure even mixing.
In a separate bowl, whisk together the flour and salt. Gradually add the dry ingredients to the butter mixture, mixing just until the dough comes together. Overmixing can result in dense cookies, so stop as soon as no dry flour remains.
The dough should be soft but not sticky. If it feels too soft, refrigerate it for 20 to 30 minutes before shaping.
Step 3: Shape the Cookies
Preheat your oven to 350°F (175°C). Line baking sheets with parchment paper.
Roll the dough into small balls, approximately one tablespoon each. Place them on the prepared baking sheets, leaving space between cookies.
Using your thumb or the back of a small spoon, gently press an indentation into the center of each dough ball. Be careful not to press too deeply or crack the edges.
Step 4: Bake the Cookies
Bake the cookies for 12 to 14 minutes, or until the edges are set but not browned. These cookies should remain pale and tender.
Remove them from the oven and allow them to cool on the baking sheet for a few minutes. If the indentations have puffed slightly, gently press them back down while the cookies are still warm.
Transfer the cookies to a wire rack and allow them to cool completely before filling.
Step 5: Fill with Lemon Curd
Once the cookies are completely cool, spoon or pipe the chilled lemon curd into the center of each cookie. Use enough to fill the indentation without overflowing.
For a polished look, a piping bag or zip-top bag with a small corner cut off works beautifully.
Tips for Perfect Thumbprint Cookies
- Always use room-temperature butter for smooth mixing.
- Chill the dough if it becomes too soft to handle.
- Avoid overbaking; pale cookies are tender cookies.
- Let cookies cool fully before adding lemon curd to prevent melting.
- For extra shine, lightly warm the curd before piping.
Variations and Flavor Ideas
These thumbprints are endlessly adaptable:
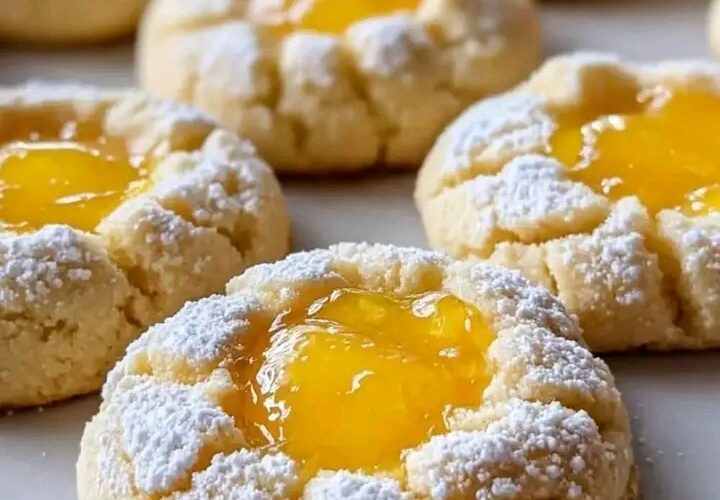
- Add a dusting of powdered sugar to the cookie base.
- Swap lemon curd for lime or orange curd.
- Add poppy seeds to the dough for texture.
- Dip half of each cookie in white chocolate after filling.
- Add a touch of almond extract for a subtle twist.
Storage and Make-Ahead Tips
Store filled cookies in an airtight container in the refrigerator for up to five days. For longer storage, freeze the unfilled cookies and add lemon curd after thawing.
The lemon curd itself can be made up to one week in advance and stored refrigerated.
Serving Suggestions
Lemon curd thumbprints pair beautifully with tea, coffee, or sparkling water. They make a lovely addition to dessert platters, holiday cookie boxes, and afternoon gatherings.
Serve them chilled for a refreshing bite or at room temperature for maximum buttery flavor.
Final Thoughts
Melt-in-Your-Mouth Lemon Curd Thumbprints are a celebration of simplicity done right. With a tender cookie base and a vibrant lemon center, they prove that classic recipes never go out of style. These cookies offer elegance without complexity and comfort without heaviness.
Whether you are baking for family, friends, or simply yourself, this recipe delivers consistent, bakery-quality results that are sure to impress. One bite is all it takes to understand why these cookies remain a favorite across generations.